Category: Sales Operations

  • Road to Hitting Your Quota Territory Plan Package

    It’s that time of year where territories are distributed to the Sales Team. To help your reps understand how to hit and exceed quota, you should deliver to them a Road To Hitting Their Quota Package to help them be successful. What is in a Road To Quota territory package? When the updated territories are rolled out to the Sales Team, providing your reps with a Road To Quota territory plan will help them kickstart their year and prospecting efforts. Best practices are to change up territories typically at the beginning of the year and/or during Sales Kickoff, so presenting a Path To Quota document is a great resource to have them hit the ground running.

    What Should You Include in a Road To Quota Plan?

    The Road To Quota package should include the following:

    • Providing the Methodology Behind the Approach to Territories.
    • The Rep’s New or Updated Territory.
    • The Top Prospect Accounts in that Territory.
    • The Top Customers in a Territory.
    • What is in the Current Pipeline.
    • What is the Pipeline Build Needed to Hit Quota.
    • The Reps Different Ways to Hitting Quota.

    This post will go into depth regarding the above sections of a successful Road To Quota package to deliver to your reps

    Providing the Methodology Behind the Approach to Territories

    You want your Sales Reps to know the methodology behind how you built out the Territories that they are given. Ultimately, the primary objective is to put everyone in a position to be successful. Typically, you want to provide analysis of the territory looking at the historical bookings, what the average sales price is in that territory, what the length of sales cycle is, as well as the win rate. Based on that, you can take a look at the current pipeline and determine a quota based on the strength of the territory. If you have top tier accounts, you should also provide the methodology on how you ranked the prospect accounts in your database.

    The Reps Territory

    Territory Planning East Coast Road to Quota

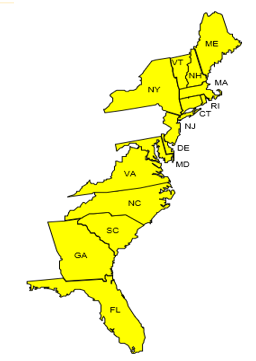
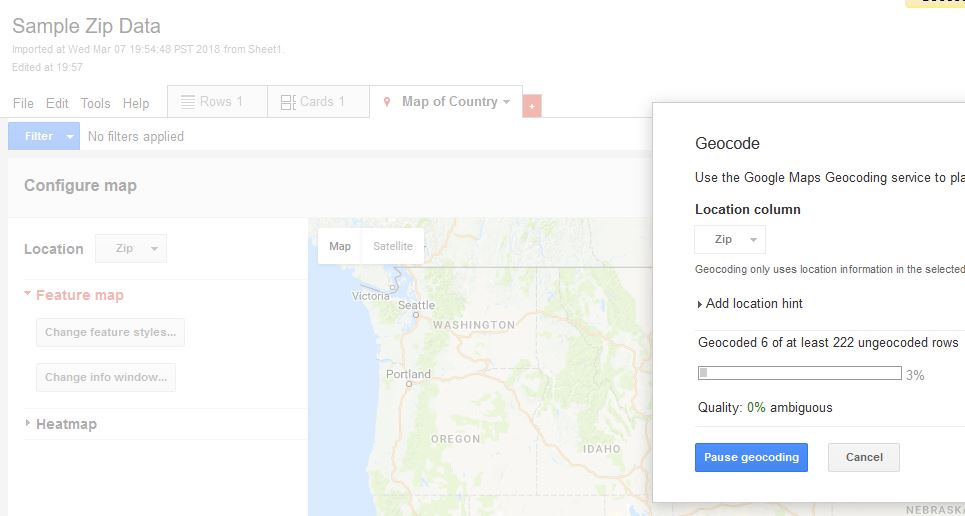
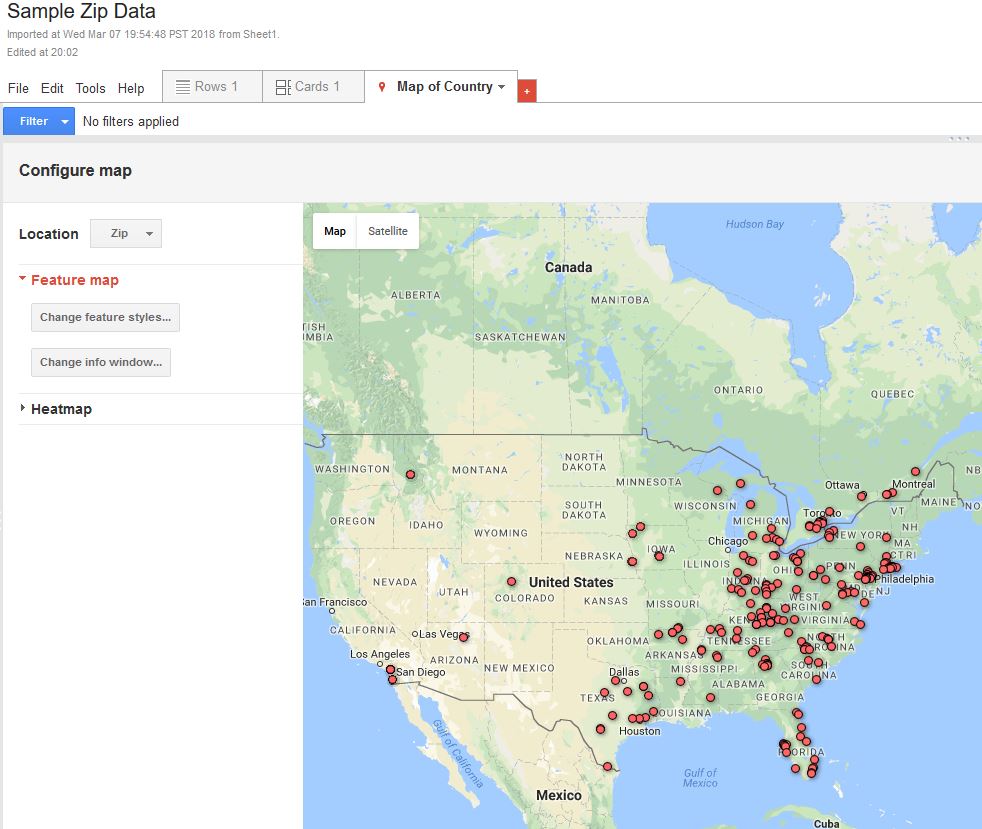
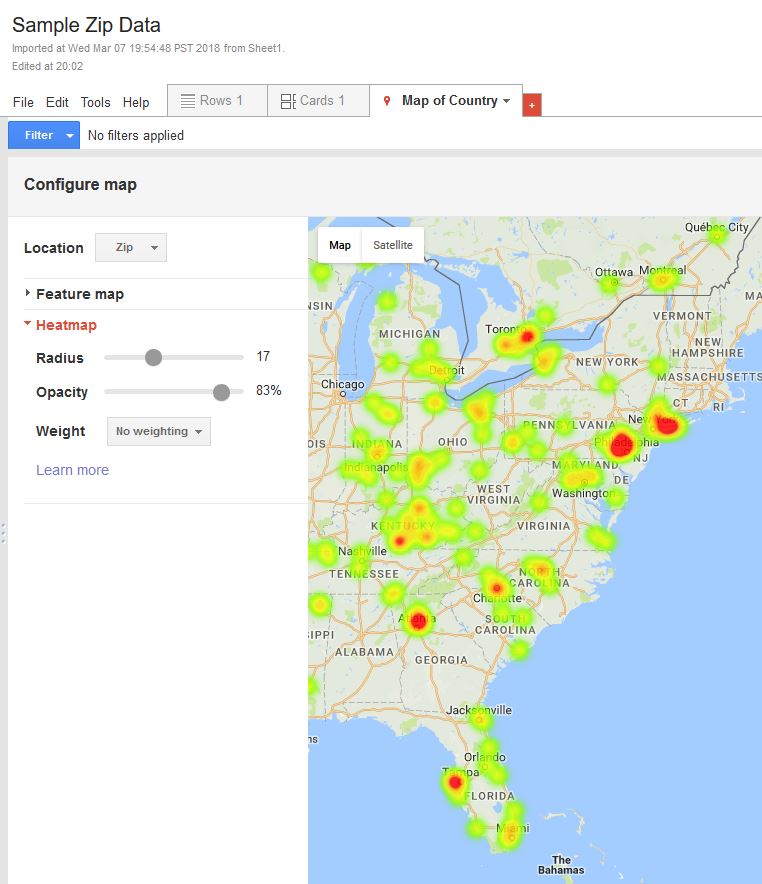
    The next piece of information in a Road To Quota document should be the actual territory. What are it’s characteristics? If you separate Territories via geographic location, industry vertical, product line, employee size, other other values, you will want to lay that out to the rep so they are clear in what the territory is that they are working. Having a visual representation of the geographic location is also good so they can refer to that in a printed out plan (such as the above).

    Territory Attributes

    Providing information on a territory is helpful in showing a rep the strength of the territory. Since you distributed the territory based on the analysis, why not go over the methodology with them? Things to consider showing would be:

    1) The number of opportunities created in the last year.

    2) How many opps have been won in the previous year.

    3) The Average Sales Price of the Territory.

    4) The previous Win Rate %.

    5) The typical length of the Sales Process.

    6) The historical pipeline.

    7) The Number of Top Tier Accounts to target.

    8) The opp penetration rate of the territory.

    Other useful information to include could be: the number of customer accounts, any greenfield/white-space analysis you performed, and the current pipeline. However, we do cover some of these in other areas as well.

    Top Prospect Accounts in the Territory

    Based on the scoring methodology shared earlier in this document, you can rank the top prospect accounts and provide them in a standard report for a rep to work on. Make sure your rep understands why they are top tier:

    -Do they match your ideal customer profile?
    -Are they actively searching, or have they searched in the past for solutions to business pains that your service can fix?
    -Has someone in the sales organization engaged with the prospect in the past?

    This information can help your sales rep target the top prospects, even creating ‘Account Plans’ to strategically target these accounts, including the help of their SDR or Marketing department if available.

    Customers in that Territory

    Customers can be a great reference to a prospect in a sales cycle. Putting the top Customers in a reps territory in a slide can let them know who to reach out to or be able to reference. On top of the Top Accounts, this information can also show your Sales Reps how many customers there are, what their growth could look like, and what their cumulative revenue is.

    Current Pipeline of the Territory

    Highlighting the current pipeline of the territory will let the rep know which Opps are in what stage, what the forecasted amount is, as well as the total number of opportunities that can currently be worked. This is beneficial for the next component of the Road to Quota document which shows what pipeline build is required for territory to allow the rep to hit their quota.

    Pipeline Build Required

    For each rep, you want to understand what the Annual Quota is, and do some analysis of the Average Sales Price (ASP) is to figure out what the number of Opportunities are needed to close to hit their number. Based on the win rate of that territory, you can back out the number and dollar amount needed from the pipeline to hit quota. You can further segment this down by understanding what the percentage contribution from the different departments such as Marketing and the Sales Development team would be, to figure out how much of the Rep’s own outbound is needed. From this analysis, you can break down the Pipeline needed per month from each of those sources, to give the rep the total monthly pipeline build that is required to hit their quota.
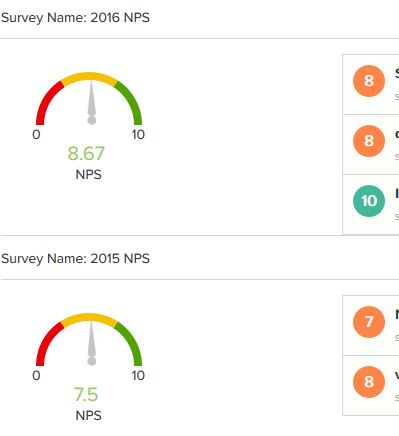
    Conversion Rates

    This particular section of the Road to Quota document showcases both the Conversion Rate across the sales organization as a whole, as well as the rep’s win rate for opportunities. Looking at the previous 12 months, how many opportunities have been created, and how many have been moved to closed won. If you are able, you should provide an analysis of the conversion rates between each of the Sales stages. This can show areas of improvement for the rep and where they are at to the company average.

    The Reps Road to Quota

    There are several different avenues a rep can work at to reach their quota. Using the analysis of the Quota, current Pipeline, and current open Opportunities you can map out the different paths that a rep can take to meet and exceed quota. With the Average deal size being the median range, you can figure out how many deals in which segment to meet the Total Bookings number. The ASP can then be determined from this new segment. You can easily provide up to five different paths for the rep to hit their quota, whether they focus on the average company ASP, mid range, small, or even going after the larger accounts to hit quota.

    This Path To Quota document is ultimately the best way that a rep knows they can be successful with a given territory. What sort of other documents do you use when you update territories?

  • Sales Development (SDR) Metrics That Matter

    The ultimate goal of Sales Operations in a SaaS (Software as a Service) company is to align the overall organization’s roadmap and build & execute on a successful Sales Strategy to create predictable growth in Revenue and New Business. What this involves is building a set of KPIs and Dashboards to drive insightful actions for each aspect of your organization across Marketing, Sales, and the Customer Success teams. At the very top of the funnel is driving “New Business”. There are three functional departments that have this responsibility – Marketing, Sales, & Sales Development. This post will focus solely on the ‘Sales Development’ department. Sales Development is the function of a company that is infamous for ‘cold calling’ or ‘cold emailing’, and the reps are commonly referred to as SDRs.

    I’ve spoken with several colleagues that work in other SaaS companies that are thought leaders in this space, and have gathered the SDR Metrics that matter to them (thanks Jasmine, Stephen, Phil, & Brian!). This post is a summation of my conversations with them.

    SDRs go by many different names in the software industry. They have been known as Business Development Reps, Sales Development Reps, Enterprise Business Reps, Lead Development Reps, Marketing Development Reps, Inside Sales Reps, etc. The goal of this role is to work on the outbound and inbound lead generation and qualification side of Sales, alongside Marketing’s alignment, to build the top end of the funnel.  Whether the SDR team is solely focused on Inbound, a hybrid mixture of Inbound and Outbound, or focused completely on Outbound; their goal is drum up new business and move a lead/company through the qualification process; ultimately passing them off to Sales [the ‘Closers’, commonly known as Account Executives (AEs)], as a Sales Accepted Lead to continue moving the Prospect through sales cycle.

    Being at the top end of the funnel, the SDR team is vital to meeting the overall company goals. Working backwards of the organization or business unit’s goals, and knowing the close rate of opportunities as well as the average deal size – you can figure out the quota that needs to be attained by your SDR team. What are the metrics that are important to measure to understand SDR effectiveness? I’ve broken these metrics down to three groupings – Activities, Outcomes of those Activities, and the Opportunities that are generated.

    There are other metrics that are important, such as tracking the inbound leads that has been generated from Marketing, but I won’t address these ‘warm leads’ in this article. Typically these involve Service Level Agreements with Marketing on new pipeline delivered to the SDR, and the SDR tasks and actions on these leads. Metrics that are important are time between lead creation, conversion, and first call, etc.


    Sales Development Metrics

    Below are a few of the metrics that matter when understanding SDR KPIs.

    SDR Metric #1: Activities

    The first metric that is important to measure is the activities that are being done. Activities have a huge correlation with the the outcomes of the interactions, which ultimately lead to closed won deals. How many dials are the reps making a day? How many emails are they sending? What sort of social interactions are they having with the prospect?

    Activities, and phone calls in particular, are correlated with success. By understanding the amount of dials, emails, and social touches a rep is making a day can influence how successful they are in their job. Moreover, if you’re using a sales enablement tool (Outreach, Salesloft, Tout, Mixmax, etc), you can automate the tracking of these activities into your CRM (such as Salesforce, Zoho, Dynamics, et al)

    A few good reports to have are:

    1. Calls/Day
    2. Calls/Week
    3. Emails/Day
    4. Emails/Week
    5. Social Touches/Day
    6. Social Touches/week

    You can then display these reports into a dashboard of the entire team for the manager & other executives of the organization to view. You might even have weekly SPIFs (Sales Performance Incentive Fund) that incentivize them to make their activities, such as a free lunch or giftcard during team meetings.

    Other metrics that we want to include are also how quickly the sales development team is following up on inbound leads, or things that can be classified as ‘immediately actionable’. Items like these are ‘call me’ requests, ‘demo requests’ and pricing inquiries. These are segmented out from items such as white paper downloads or 3rd party uploads.

    Metric #2: Outcomes

    The second important metric to track are the outcomes of the activities that the SDR team is doing. How many connects is the SDR making – actually getting in touch with someone and having a conversation with them, not just leaving a voicemail? How many initial meetings are being booked by the SDR? What is the time it takes to move opportunities over as sales accepted leads? What are the percentages of initial meetings to sales accepted opportunities?

    The outcomes of the activities that are performed are important as well. We want to be able to view what the outcome of these calls are (aka Call Dispositions). What sort of sequences, or the process of SDR follow up – are more effective than others? Can we A/B test these campaigns to optimize the correct follow up for the different personas of the organization?

    Looking directly at emails, what are the rates of Opens, Clicks, & Responses each email is getting? Can we move the lever towards more conversation?

    A few good reports to have are:

    1. Call Connects/day

    2. Call Connects/Week

    3. Email Replies/Day

    4. Email Replies/Week

    5. Initial Appointments (meetings set)/Day

    6. Initial Appointments (meetings set)/Week

    By running tests on different cadences on different prospects can help refine your follow up strategy. Does the campaign that the prospect is going through have different email and dialing cadences? For example, are you reaching out too much or not enough? Is the content of the email resonating with the role of the person that is receiving it?

    Metric #3: Opportunities

    Opportunities are all about pipeline contribution. Based off of the number of opportunities and what stage they are in, we can predict what the total amount of closed bookings can be within the quarter by relating them to historical figures and conversion rates. The tracking of opportunities is vitally important to understand the effectiveness of the SDR team.

    In this, we want to know – was the opportunity created by the SDR? What is the total number of opportunities that they are creating? When a prospect moves from a qualification stage and is passed over to the Account Executive, what was the amount of the of the deal?

    With this information, we can get relevant insight into:

    1. How effective is the overall SDR team being?
    2. Where are there coaching opportunities to train the team?
    3. How can we move the needle on company objectives if we add another member to the team?


    SDR KPIs that Matter

    The goal of an SDR manager, Director, or VP is to create new business. One of my colleagues has a great visual he writes on the whiteboard for his SDR team. It describes the four quadrants that an SDR can fall into:

    Sales Development Metrics Quadrant
    Thanks for sharing this with me, Stephen!

    In the Top Left Corner, you can see that the SDR is making all activities and goals. In the eyes of the manager or director, the rep is golden & will not be micromanaged. Leadership should focus on the career-pathing of this SDR, and how they can grow within the company.

    In the Top Right Corner, you will see that the SDR is making their goals, but not hitting their activity requirements. This is something that the manager will be curious about, and ask. The nagging question in the manager’s mind is – “could they do better?“.

    On the bottom left corner, the SDR is making their activities and not their goals. Here is a great opportunity for coaching. What are they doing that is different from others on the team? How can the manager help the SDR improve their performance?

    Finally, in the bottom right corner of this quadrant, the SDR is not making the activities or hitting their goals. In this area, the manager’s conversation with their employee will probably be around soul searching. Is this the right company for them? There may be a formal plan involved to have the SDR hit their goals or decide that they are n0ot a good fit for the role.


    Hope you enjoyed this article, and thanks again for all my colleagues that contributed. Leave a comment and let me know what you think!

  • What is a B2B Buyer Persona?

    What is a B2B Buyer Persona?

    Have you ever heard of the term, Buyer Persona? If you are in Marketing, Sales, or Business Development, you will inevitably come across this industry term in one way or another. Since this article is targeted more towards Business-to-Business Sales & Marketing, I will focus on answering the question this way – What is a B2B Buyer Persona?

    A Buyer Persona is a breakdown representation of your “Ideal Customer”. On one hand, for Business-to-Consumer or “B2C” businesses, it could be a certain subset of the population. For example, your niche product or service can target “Female Firefighters between 30-35 who live in New York” or “Male High School English Teachers in Ohio”. There are many different ways to target a niche, and this micro-targeting has been compounded by big data analysis and marketing tools like Google & Facebook advertising.

    On the other hand for B2B companies, a Buyer Persona can target the makeup of your ideal customer and how the organization works in a buying cycle. This can also be referred to as the ‘org chart’. Within a company, you can have different departments and employees with differing goals or objectives, obstacles or roadblocks, concerns or issues to overcome, and responsibilities to manage.

    This Buyer Template should align with whatever your chosen sales methodology is. That is, who is the economic buyer, who has the specific need and/or pain, who is your champion, etc.

    Note: You can check out more about different Sales Methodologies in this link if you’re interested in learning more.

    The individual contributor of a specific role in your Ideal Customer can then be represented by a “Buyer Persona Template” in your sales playbooks. For most companies, each role should have a specific buyer template created for them.

    What Are B2B Buyer Persona Templates Used For

    The reason that we create “Buyer Personas” is to identify the different people that engage with the buying process (whether it is marketing, sales, support, etc), come up with a methodical approach on what their role is in the sales cycle, and identify how your company or service can help. Buyer Personas help by identifying certain targeted material or talking points to reduce that person or department’s concerns and identify ways to get them on your team. Next, we’ll go through a sample Buyer Persona template and each section that can be added to each one.


    B2B Buyer Persona Template

    Below is an example of a Buyer Persona Template:

    A Buyer Persona Template for use in a sales cycle with sections to fill out.

    You will see a few sections on this template. Let’s break them down and how they are relevant.

    Name & Summary:

    Giving a name & face to the buyer is a great mnemonic strategy to help easily recall who they are. You can use a naming convention like “Ivan the IT Manager” (like the cover photo) or “Celeste the CEO” for all personas you have identified that are involved or influence a buying cycle. Matching the first letter of their name with their title helps.

    In addition, a summary section can give a brief overview of how the specific buyer profile interacts with the other personas in the company. Does Ivan report directly to Celeste, or is there a CIO or Director of IT? If that other person is involved in the process, you’ll want to create a Buyer Persona for them as well.

    Responsibilities & Concerns:

    What does Ivan do at the company, and what does he care about? For example, he could be the owner of the business tools and provide helpdesk support to the organization. If your product is a software service, he can potentially be the owner of your tool. His concerns may be how easy it is to provide end user support and administration.

    Goals & Obstacles to Reaching Goals:

    What are the goals and obstacles that this person faces in their day to day? If it is a CFO, they are tasked with staying on budget. Their obstacles could be unpredictable costs & trying to predict future events that can financially impact the business (a slow down in manufacturing, oil prices increasing, etc). How can your service provide an ROI for them?

    Sales Cycle Role:

    At what stage in the sales cycle do they get involved, and what is their role in the Sales Cycle? Are the people in these roles the end users, decision makers, economic or technical buyers, etc. In other words, the goal is to share how you want to message your service to them.

    How your company helps:

    How does your company help in the day to day or overall strategy to the organization? If you sell software that enables collaboration like Slack, you can highlight a single repository of data that could be lost in emails. For a software engineer, this can be remote communication with the team. For a CEO, this can be a great place to share announcements with the company. IT could like the ease of setup and administration.

    Other Information

    In this section, you want to include any key features, the sales challenges to overcome, and how to win them over.

    1. “Key features” include key areas of your product or service that can help the specific role.

    2. “Challenges to the Sale” can be competing priorities, budget concerns, etc.

    3. “For how to win them over”,  highlight how can your service provide an edge over the competition, create an efficient process, pass audits, etc.

    Buyer Persona Example Titles:

    Depending on the makeup of your Ideal Customer, and the organization of specific roles, you could create personas for these different roles or people that roll up to these individual departments:

    1. CEO –

    The CEO is the head of the organization. What sort of things would they care about? Most likely how effective their company is running – profitability, their compensation, their market size, etc.

    2. CFO / Finance –

    The finance department falls under this team. Can be responsible for Accounts Payable / Accounts Receivable, Collections, Financial Planning & Analysis, etc.

    3. CTO / Engineering –

    Under the CTO is the Engineering team. There can be multiple different roles, system engineering, product management, engineering lead, etc.

    4. CIO / Information Technology –

    Roles that roll up to the CIO could be the IT Manager or admins of your tool. Could also be responsible for security.

    5. COO / Operations –

    Operations typically has responsibility over Supply Chain, business reporting, etc.

    6. CMO / Marketing –

    Responsibilities can include inbound and outbound marketing, demand generation, digital marketing (pay per click advertising), the website, etc.

    7. CSO/CRO / Sales –

    The Sales Team can report to a Chief Sales Officer or Cheif Revenue officer.

    8. CCO / Customer Success –

    With the advent of B2B recurring software models, customer success has become more and more important. They care about customer satisfaction and reducing customer churn.

    Hope this article has provided an overview of what a Buyer Persona is and used for! Let me know what you think about this article in the comments below.

  • Salesforce Change Management Best Practices

    After speaking with a colleague the other day, they asked me what are the best practices for change management within Salesforce. This article will dive into how I manage changes in Salesforce using a Salesforce custom object used to build a Change Request app.

    Salesforce Change Management Methodology

    The reason that change management is important is for several reasons; we want to continually keep metadata clean, remove unused processes, and manage our storage effectively. Also, being able to track and prioritize requests helps keep your company’s overall initiatives moving forward. I’ve been the main administrator of a Salesforce Org that went live in December, 2000. As of this writing, that was almost 18 years ago – back when Salesforce was first founded. As I’m sure you can understand, there were fields, apps, and components within that Org that were no longer used and were filling up storage space. One example was the activity history. We were using over 5 GB of that, with them ranging from “Call: Not In” from back in 2004. Do we really need this data?

    Using a custom object (or leveraging the Case object with a unique Record Type), you can easily build a tool within Salesforce to track, approve/deny changes, and have a historical reason of “WHY” you built a certain field, process, email alert, workflow, etc.

    Salesforce Change Request Template

    The template I use to manage the change has a few components, which can easily be updated and extended to your particular Org’s needs.

    Template of Salesforce Change Management

    A. Change Request Name:

    This field provides the name of the change request, which, at quick glance, should display a high level overview of the objectives of the change from the requestor.

    B. Change Stage/Status:

    I use the below drop-down selections to understand where a change is in it’s life-cycle.

    -Not Started
    -Approved
    -In Process
    -Completed
    -Denied

    Here, you can have workflow rules & approvals. When a change is created, it can send me an email of a new change with some of the information. I can quickly take a look and approve/assign it to the appropriate person to follow up. In rare cases, I will deny a request. Once approved and assigned, it will be moved to in process until completed.

    C. Change Requestor:

    This field is used to understand who is requesting this change, and is used to send an email alert when it was successfully logged, and can email when completed/denied. This closes the loop for the parties involved.

    D. Change Date Fields:

    Two important date fields I leverage are:

    -Date Requested: This field is updated when a Change record is created.

    -Date Completed: Once stage is marked to completed, it will update the date field to TODAY(). This is when it is moved to either Completed or Denied.

    E. Change Owner:

    Who the Change owner is assign to complete the task. When the ownership is changed, an email alert can go out to update the assigned owner. All changes are assigned to me as the owner, and then I can easily update that and have an automated email go out to the newly assigned owenr.

    F. Change Description:

    This field is required to create a change. The change requestor will fill out what is being asked. These projects can be something that can take as little as 5 minutes, such as adding a picklist value to a field, to up to several months – such as tracking a project and the sub-requirements of that project. Sometimes changes prompt the need for more information, and this can be tracked in the notes/attachment related list of the record, or as a working revision in the ‘results’ section.

    G. Results:

    The result field is used to explain the methodology used to perform the task. Typically what is included the URLs of the fields, the field names, and any other comments relating to the results. This field is very important to use for historical tracking of why a field was created, and what are all the components of the change that were used to solve this particular initiative.

    Salesforce Change Request App

    Instead of recreating the wheel, you can also easily download a change request app from the Salesforce AppExchange. The app I use is called Change It. I wanted to give a shout out to CloudLogistix who created this app back in 2007. I still use it to this day. You can, of course, easily create a custom object or update the Case record to solve this, but out of the box it works great, and has the majority of the above fields & created list views. You will need to have an admin create the workflow rules and email alerts, but it is great if you don’t want to hit the soft limit of the allowed workflow rules.

    Hope this has shed some light into how I handle change management in Salesforce. If you have any questions or comments, please don’t hesitate to reach out to me at the contact form or in the comments below!

  • What You Need To Know About a Net Promoter Score (NPS) Survey

    What is the Net Promoter Score and how can you use it to understand how you are doing with your customers? This article will cover everything you need to know about the Net Promoter Score, and how to build an NPS Survey.

    Net Promoter Score Definition

    The Net Promoter Score is a metric that is promoted as being correlated to ‘Customer Loyalty’. Originally created by the consultancy firm, Bain & Company & software firm Satmetrix; the score is based on a simple scale of 1-10.

    Faces of the different net promoter scores
    The types of Net Promoter Score responses you can expect to receive.

    When a respondent’s score falls within the 9 or 10 range, they would be considered Promoters. Promoters are your loyal customers who will advocate internally and act as your customer champion.

    People who respond with a score between 7 or 8 are known as Passives. Passives are customers who may be satisfied, but most likely will not go out of their way to sing your praises or be a customer advocate.

    At the other end of the spectrum – if the responses to your survey fall within 0-6 on the scale, the respondents would be considered Detractors. Detractors on the NPS survey are respondents who would be those unhappy customers who do not enjoy your product or service, and may speak badly to friends or colleagues.

    Net Promoter Score Questions

    The Net Promoter Score, as designed, is based on only one question:

    On a Scale from 0-10, with 10 being the highest – how likely are you to recommend our product to a friend or colleague?

    This question should allow a selection of scores on a scale of 0-10, and is typically followed up with an opened ended question. Why?

    The question begs the question “Why did you respond the way you did?” This answer is more qualitative in the results – meaning you cannot lump these responses without further manipulation of the data set. This “Why?” follow up question has responses that can range from describing the ease of use of your system or tool, their experience within the customer journey, and much more.

    Net Promoter Score Calculation

    The Net Promoter Scores are not necessarily calculated by taking the average (the mathematical ‘mean’) of the responses, but by taking the percentage of where the detractors respond, minus the aggregate percentage of promoters – to get your score. While complex, the simple methodology we’ve found that works is to just take the average ‘mean’ calculation:

    Based off of the numerical responses in the survey, you will have your overall NPS score. Below, I will share an example of two years of Net Promoter Score results. Let’s say that in the 2015 survey, let’s imagine we had two results, 7 & 8, when added together = 15, and divided by the two responses leaves us with a score of 7.5. However, in 2016, we had three responses, 8, 8, & 10. These summed will be 26, and divided by the three results leaves us with a score of 8.67.   In this figurative example, the scores are improving, from 7.5 -> 8.67 – which would indicate a good sign overall. Visually, this will look something like the below:


    Two NPS Survey Results Calculated
    Ideally, all your customers would have your survey results fall in the 9/10 range, show in the above gauge as falling into ‘green’.

    Net Promoter Score Example

    The Net Promoter Score is not just the question, “On a Scale from 0-10, with 10 being the highest – how likely are you to recommend our product to a friend or colleague?”, but should also include an open-ended question to have the respondent explain the reasoning behind their given score. This qualitative feedback can provide insight on where you can improve your business, & what your customers view you are doing well in. Open-ended responses can be along the lines of “I’ve received terrible customer service/support” to “Your rep, X, has been a pleasure to work with”. Taken along with the score, you should  be able to paint a good picture on where your customer’s loyalty is.

    Why Use the Net Promoter Score?

    The Net Promoter Score is not without it’s criticisms, however, can show year over year growth based on the feedback from the team given the survey results. I will list some of the criticism I’ve experienced below.

    Closing the Loop

    One potential pitfall of just relying on the just the Score from the NPS survey is not closing out the loop with customer by providing feedback. While a generic “Thank you for your response.” is great, following back up with the customer in an individualized manner will give you a chance to share your appreciation of their feedback more. This is especially in the case of your Promoters/Champions. Close the loop with your customer and thank them for their time, and let them know that their feedback will be discussed internally and help address any issues that they are currently facing.

    Personalization

    Since the NPS Survey will take into consideration overall teams or your entire customer base, it sometimes loses the individual aspect of it. By diving deep into the follow up “Why?” question and looking at individual responses, you can avoid the pitfall of viewing the lump score. This also relates the closing the loop, in that you need to not only look at responses and see the forest for the trees, but you also need to dive deep and inspect each tree. You need to understand what made a detractor give their negative review, and what a promoter has said to give the positive response. These responses may not be mutual exclusive, or they may be entirely uncorrelated. An example could be that a detractor hates the interface, but the promoter loves it – by digging into the personal responses, you realize that the Detractor uses Internet Explorer, while the Promoter uses Chrome. A potential fix can be to either show a message on IE that it is unsupported, or work to support IE for your customer base. Another answer could describe the increasing cost of your service, while a factor to consider, should provide insight into why they responded the way they did.

    How Do You Improve?

    Ultimately, the NPS Score is meant to gauge where you stand with your customer base, and set a course on how to improve. With a constantly changing market landscape and customer base, this can be a slippery slope if it is the only score you use to drive forward your business. If a company focused all of it’s resources on improving the NPS Score – other things such as profitability, time to market, etc can fall to the wayside.

    I am a proponent of using data points such as the NPS Score to influence how a company can improve. Now that you understand what the Net Promoter Score is, and why to use it – what are your thoughts on it? What other metrics do you use to see how well your organization is doing? Feel free to reach out, or let me know in the comments!

  • Process to Automatically Change Contact Owners to the Account Owner in Salesforce

    How can you align the contact owner with the account owner in Salesforce, automatically? There are many ways and reasons to do this, and unfortunately, is greater than the scope of this article. These Salesforce support requests below cover some of the use cases for this feature:

    We’ll focus primarily on creating a process to update the contact ownership to the account owner when a record is created or updated to match a certain record type. In our scenario, let’s just say that we need to have all of our Customer Contacts be the same owner as the Account Owner – regardless if Support, Finance, Marketing, Sales, Order Operations, or any other members of your organization creates a contact associated with that account record. This process will also trigger if you move account ownership from one user to the next. Here is an example request I’ve received:

    Account Ownership Change Request Salesforce

    How can we create a process to transfer ownership automatically, rather than manually?

    Using Process Builder to Update Contact Owner to Account Owner in Salesforce

    Using Salesforce Process builder makes this requirement very easy to implement.

    NOTE: If you are using several API only integration users that have access across your Org, and have many contacts associated with an Account, you may run into errors such as Too many DML rows, or the ALL_OR_NONE_OPERATION_ROLLED_BACK error. In these scenarios, you can update the Process Builder to exclude the Account IDs of accounts that cause problems, or limit the integration user from access these records.

    Starting off, I’ve already created a formula on the Account Object to view  the Account Owner Id on the Account Record. If you aren’t familiar with how to do this –  create a new formula field on the Account record to pull that ID using “CASESAFEID” similar to the below image:

    How to Get Account Owner Id In Salesforce

    Got that all set? Perfect, now let’s pull up the Salesforce Process Builder, and click the create a new process. Let’s give it a name and give it a  description. (our click path would be Setup->Create->Workflows & Approvals->Process Builder). Click “new” in the top right corner. Give it a name and description. When you get to the drop-down for”The process starts when”, we’ll select whenever a record changes.

    Salesforce process builder contact owner to account owner

    What this will do is whenever an account record changes, it will invoke our process. Our second step is to add the Object that will be changed to our process. We’ll select the Account object, and set it to run whenever a record is created or edited.

    For the next step of our process, we want to have the criteria condition be that an “Account Becomes A Customer”. To do this, we’ll pull the Account Record Type ID and have it equal to the Customer Record type we’ve set in our Org. Here is where you’ll also want to eliminate accounts that may have too many contacts. You’ll see that in the below as Account ID “does not equal” :

    Salesforce Process builer - customer account ownership to contact ownership

    After creating the criteria condition in the above, the next step is to “Update the Contact Ownership”. To do this, we want to filter the criteria to only include Contacts whose ownership is not equal to the account owner. In the below, you’ll see how we set that the Contact Owner ID =! AcctOwner ID. The new field value that we’d update will have the owner ID be a formula, which will pull the account owner ID and set that as the contact owner ID :

    Salesforce Account ownership = Contact ownership

    The reason we have the contact owner not equal to the account owner id in the filter criteria is so the process does not unnecessarily update contact ownership that already  is owned  by the current account owner.

    Our final step is to activate this process, and use a Customer Record Type to test the process and confirm that it works. Congrats, we’ve successfully created a process to ensure that all contacts are owned by the account owner!

    Do you have any issues updating contact ownership with an account? Reach out to me in the comments below!

  • Generating a Geographic Heat Map with your Salesforce Account Data

    Are you trying to find where your top customers or prospects are located geographically? Being able to visualize this data in a heat map can help you figure out your top target customers, manage territory realignment, increase headcount in a certain area, and many other use cases. This article will go over how to generate a geographic heat map by using Salesforce Account Data, in particular, we will be using just the Zip Code information of account records.

    This tutorial uses Google’s Fusion Tables that can be a accessed from your Google Drive. What is phenomenal about Fusion Tables is that it is a great visualization platform that can create bar charts, pie charts, and what we’ll be using – Geographical maps – from any source of data you provide.

    Getting Started with Google Fusion Tables

    You can possibly skip this section if you already have access to Google’s data visualization tools. To get started, we’ll first head over to Google Drive. If you don’t already have a Google Account, go ahead and create one. Once there, we’re going to have to connect Fusion Tables to your drive:

    Connecting Google Drive Fusion Tables

    As you can see in the above image, I have already connected Fusion Tables, but if it’s your first time – once in Google Drive, Select “New” and  then”More”, from there, click the ‘connect more apps’ for the search screen to show up (below). Once it does,  search for “Fusion” and click ‘Install’ next to it to associate with your Google Drive:

    Associating Google Fusion tables to Google Drive

    Congrats, your Google Drive now has Fusion Tables! This next section will briefly go over exporting a report in Salesforce – if you already know how to do that, feel free to skip to the section after that.

    Exporting a Salesforce Report

    Next, you’ll want to have an export of the data you are trying to visualize. You can get that data by creating a report in Salesforce, select the Account Report type, and pull out any relevant data within the filters. We opted for Dummy Customer Accounts in our Sample Zip Data CSV. In the columns of your report, specify ‘Zip Code’ as one of the data points that we want to export. The Zip Code data will allow us to map with the help of Fusion tables & the Google Maps API. Once your report is created, let’s export the report as a .CSV.

    Now that we have our data, it is time to upload this to Google’s Fusion Tables.

    Using Google Fusion Tables to Create a Heat Map

    Let’s fire up a new Fusion Table. Go to Google Drive, and Select “New” -> “More” and then “Fusion Tables”. Once there, it will prompt you to Import a new fusion table. Select the CSV of the report that was generated earlier. As the data populates into the Fusion Table, it will look like the below:

    Uploading Sample Zip Data to Fusion Tables

    By default, the table will associate the ‘location’ as the target data point to visualize (do you see how the United States Country is highlighted?). It is easy to adjust a different column to be the data source. Just hover over the area at the header of the column, and click the arrow as it appears, and select ‘Change…”.

    Moving Fusion Tale Column Location to Zip

    This will allow you to adjust the data ‘type’ of the column to be Location (from the default “Number” that Fusion Tables associated it with).Change Zip data point to location

    Now that the Zip Code column is referenced as a location, in the “Map of Country” tab, we’ll select Zip as the location. Once you select this, Fusion Tables will start Geocoding for you.

    Geocoding in Fusion Tables form Zip

    After Fusion Tables has finalized the Geocoding, you will see a plot map of your Zip Codes:

    Fusion Tables Point Map

    It is very easy to adjust the map from displaying ‘plotted’ points to a heat map. In the left side bar section, Click “Heatmap” under “Feature map”:

    Fusion Tables - Adjusted Heatmp

    As you can see in the above image, we’ve successfully created a heat map! You are easily able to adjust the radius and the opacity of the map from this selection, making cities larger or darker should you prefer. It appears the majority of our sample Customers are located in Tampa, Atlanta, Philadelphia, Toronto, & New York. If our purpose was to visualize what cities we’d need to have a resource location near, this heatmap can easily serve that purpose.

    Feel free to reach out if you have any additional questions. If you have other uses for Fusion Tables or use-cases for Heatmaps, please leave them in the comments below!

  • Creating and Documenting a Dunning (Collections) Process

    Having cash in the bank is a vital requirement to run a successful business. Being able to pay your vendors, employees, and other company debts on time can ensure that a organization can continue doing business. Sometimes a business’ runway is short, and if it is venture-backed, may need to raise another round of funding, or if not, take a loan in the form of issuing bonds, or an accounts payable line of credit through the bank. In more dire circumstances, not having enough cash can cause the company to file bankruptcy, or the company may fold as secured creditors aim to recoup some of their losses.

    Since having cash in the bank is so important, so too is having a methodical collections process that is documented and can be adhered to. This process is known as a Dunning Process, from the word ‘dun‘ which means ‘to demand payment of a debt’.

    Defining the Quote to Cash Process

    To grossly simplify the Quote to Cash process for an enterprise software company, it typically looks like this:

    1. A Sales Quotation is signed by the customer.
    2. A matching Purchase Order from the customer is created.
    3. An Order is booked internally.
    4. An Invoice is generated and sent to the customer.
    5. The Customers pays the invoice per the agreement.

    Payment terms that are agreed upon by two corporations or entities, with a matching Purchase Order and Signed Quotation, should be what is required to book an Order. These two forms of paperwork become the enforceable contract if any disputes arise. Likewise, having a bulletproof (lawyer reviewed) Terms of Service that is associated with the signed Quotation, along with a non-payment clause within those terms, will make sure that you are able to collect on your Account’s Receivable.

    During the booking stage of an order, there are checks and balances that can be performed during this time. Some checks and balances can be put into place here, with the Order’s team asking questions like:

      • Does the Quote & accompanying PO match the customers ship to & bill to address?
      • Are the payment terms and dates of the contract the same?

    If there is an issue, then Orders can reject the booking, and have it go back to the Sales Rep to fix any mistakes. These checks and balances can be paper-based or through an online audited system such as a CRM or ERP.

    Now that the order is booked, and an invoice has been sent – what happens when a customer doesn’t pay? If the previous Order Processing steps had no inconsistencies, the customer account could fall under a Dunning Process. As an example of an inconsistency that could arrise would be if there were Net 45 terms on the Purchase Order, and Net 30 on the signed Quote – typically a larger firm will pay per the issued PO, and not what was agreed upon in the accompanying quote. This is why the checks and balances are important during booking an order.

    What is a Dunning Process?

    As we went over previously, a dunning process is the ‘demand of payment of a debt’. What a process looks like in practice can be more along the lines of gentle reminders of a past due invoice, such as emails or phone calls to confirm the payment status of that invoice. Once an invoice becomes 60+ days past due, it can become delinquent, which can have the tone of the communication become more firm in the reminder of an overdue payment. Depending on the product or service that a company provides, a material breach of the contract can occur after this point, which can be enforced with the help of an outside legal collection agency. These debt collectors take over the accounts receivable, and attempt to collect what is owed. Sometimes, additional charges such as late fees (or dunning fees) can accumulate on the debt.

    Example Dunning Process:

    A sample dunning process for a SaaS organization can look something like this:

    Past Due: Invoice Due Date + 7 days.

    Accounting/Finance can give a week for transmittal of payment by a check to a physical address from a customer. If the invoice is more than 7 days past due, an email reminder can be sent to the accounting or account’s payable email address on file, and a phone call to the department to inquire on the payment status is warranted. Typically, the majority of customers will fall into this bucket if they fall in the Collection’s process. Sometimes issues arise that can be found, such as incorrect ship to or billing address or names, no PO # addressed on the invoice, or not submitting the invoice in the correct manner.

    Delinquent: Invoice Due Date + 30 days.

    Once an invoice is more than 30 days past due, it then becomes delinquent. Another phone call or email to the account’s payable team is recommended, as is looping in the internal sales rep as well as the champion contact at the customer. Here you may find out cashflow issues from the customer, or other problems may arise.

    Severely Delinquent: Invoice Due Date + 60 days.

    After an invoice becomes more than 60 days past due, it is then in danger of being sent to a legal outside collection agency to follow up on. If your company provides software as a service, sometimes prohibiting access may be warranted to expedite payment (Be sure to reference your company’s TOS and confirm if this action is allowed).

    The process as a customer moves through the stages from Past Due to Delinquent, or from Delinquent to Bad Debt (sent to a collection agency), can be decided by and agreed upon by the Finance and Sales teams. Likewise, you’ll want to have input from your Legal team as well. Sometimes this process can be fluid, and exceptions to the rule can be made. If the process is documented, your organization will may also have the ability to automate certain aspects using a CRM or ERP tool.

    I want to make a note: It is typically unlawful to harass or threaten customers who have a debt with a company, and I would never condone such behavior.  If you do use an outside legal collection agency, be sure to have a reputable company that will represent your position lawfully. Customers are the key to a company’s success, and should be treated that way.

    Automation of the Dunning/Collections Process

    In a future article, I will go over the automation of a dunning process using Salesforce.com. Depending on how your organization’s business systems are set up & what your organization sells, certain tools or elements may manage your order booking, invoicing, and collections of accounts. Business tools such as a CPQ (configure/price/quote), CRM, or ERP system can manage this Collection’s process interdependently.

    Now that we have the fundamentals of what a Dunning Process is, this future article focuses on how to manage and automate the Collections Process from a Salesforce.com perspective.

    Is there a documented Dunning process at your organization? If so, how does that compare to the example outlined in the article? Please leave your thoughts in the comments below!

  • Account Based Scoring Methodology in Salesforce

    Having a robust Account-Based Scoring Methodology in Salesforce can help you separate the wheat from the chaff in your prospect accounts. This will allow your sales team to quickly follow up on leads that might have a low lead score, by prioritizing the account fit in your target market.

    Account based scoring is similar to Lead Scoring Methodologies, which are, in essence, just an individual score for a single person (in Salesforce as an email contact/name/etc). Key components of a Lead Score can be whether this ‘person’ is downloading content from your site, visiting key pages and/or many pages in one session, how frequently they visit, and other key factors.

    NOTE: I will be sure to elaborate more about lead scoring best practices in another article in the future, so stay tuned!

    Likewise, if you are able to discern what your target market Customer company looks like, you will also be able to score these accounts. Some key components are easy to find, and others, not so much. For example, things such as Location, Employee Size, Industry, and Revenue can help you zone in on which companies you are a best fit with. Some of these factors should be relatively easy to identify and locate the accurate information of. For example, if you are located in the SF Bay Area, and you are a service company, you may want to score an Account higher if they are within your service location. Similarly, if you sell analytical software for tracking visitors on ecommerce websites, knowing that your prospect’s industry is Ecommerce (they use Shopify/Bigcartel/Magento, or some other ecommerce software)  would mean that they, more often than not, could be within your target demographic.

    There is other data that may not be so easy to find out. For example, say you sell a bolt on plugin for users of Microsoft Outlook. Knowing that your prospect has that software as their corporate-mandated email service would most likely include them as a fit within your target market. There are multiple vendors who can provide this data [for a fee] that I have had experience working with, such as Builtwith, Datanyze, Hunter.io, and HGData.

    The exercise of identifying key components of your target demographic will be left to another post. What is relevant here is that this data can also be included in an Account Based Scoring Model.

    Creating an Account-Based Score in Salesforce

    Creating an Account Based Score in Salesforce, in practice, is easy to implement. After you’ve identified the attributes of your target customer, you can then start tracking that data. You’ll first need to have fields that you can capture the relevant data in. Let’s create four sample fields in a hypothetical scenario, where each will have four picklist values as well:

    A) An Industry field with picklist values of:
    -Software
    -Real Estate
    -Distribution
    -Service

    B) An Employee Size field with picklist values of:
    0-10
    10-99
    100-999
    999+

    C) A Location field with picklist values of:
    -United States
    -Mexico
    -Canada
    -Canada

    D) A Revenue field with picklist values of:
    -$0-$100k
    -$100k-$1mm
    -$1mm-$10mm
    -$10mm +

    NOTE: In practice, these fields may not be necessary. For example, you can use the selection of “Billing Country” within Salesforce or another CRM to build out the scoring formula field in the next section.

    Account Based Scoring Best Practices

    For best practices, and to get the correct score on your prospect Accounts, each of the above picklist values can have an associated score as well. Let’s say we’re going to figure out the Account score on a 0-100 point scale, and we decided to give equal weight to the four scores to each of the fields that are attributes of your scoring model. We would then have to decide the individual score of each picklist value in each field above. We can give each picklist value a score of “0-5”, because we’ll be using the Salesforce CASE function in a formula on a each field as a score.

    To use the CASE Function to figure out the score of each picklist value, we’ll create four new fields: Industry Score, Employee Score, Location Score, & Revenue Score:

    For the each of the attribute fields, we’ll create the associated scoring field in the same process. As an example, we’ll just create the Revenue Score field here. Create a new field on the Account Object, and set field type as a Formula. Have the field return a number. In our hypothetical company, let’s say that we have found success selling to companies in the $1 million to $10 million dollar range. For small companies, with found only some success to selling to them if they have revenue with less than $1 million, but not as much as the sweet spot. Let’s also say that we don’t sell to enterprise or small seed stage startups due to long sales cycles and churn rate, respectively. We’ll say the our sweet spot revenue is a ‘5’, and the secondary revenue figure is a ‘3’, while the rest would be 0 (or null). To create the Formula field, we’ll set it up like this:

    CASE(Revenue__c,
    “$1mm-$10mm”, 5,
    “$100k-$1mm”, 3,
    0)

    What this formula does is look at the Revenue field (Revenue__c), through the case object, if it has the picklist value of “$1mm-$10mm”, it will return 5. If Revenue has a picklist value of “$100k-$1mm”, the Revenue Score will return 3. Now let’s save the formula. We don’t have to add this to any page layout. Do this for each of the other three scoring fields.

    To bring this Account Score all together, we’ll create another Formula Field that sums up the four Account Scoring fields. Let’s called this field Account Score. Since we said our Account Score will be based on a 100 point scale, and each account score is given equal weight, we can create the account score formula as follows:

    (Industry_Score__c + Employee_Score__c + Location_Score__c + Revenue_Score__c) * 5

    What the above formula will do is sum the values from the CASE formulas in each of the “Score” Field. Again, these CASE formulas will return a number based off the picklist selections of the Account Based Scoring model we developed. Since each picklist value will be scored as a maximum value of 5, if we summed all four score fields at the highest score, they would equal (5 + 5 + 5 + 5) * 5, simplified to 20 * 5, or return the score of 100 in the Account Score formula field above. Any picklist value of the attribute fields with a score below 5 will fall along the spectrum of 0-100 points.

    Once these fields are created for the account records, you can then add them to your Prospect and/or Customer page layout.

    Congrats, you’ve successfully created an Account Based Scoring Methodology in Salesforce!

    Let me know what factors you might have to identify your target customers in the comments below.

  • BANT, CHAMP, and MEDDIC – What are the Best Sales Methodologies?

    BANT, CHAMP, and MEDDIC – What are the Best Sales Methodologies?

    In  Sales Qualification, especially when selling enterprise Software, there are a few Sales Methodologies that are best represented by their acronyms –  BANT, CHAMP, & MEDDIC. There are other methodologies, and probably many more that will be created in the future as well. Since I’ve personally only dealt with the above few, that is what I can speak about, and what this post will focus on. The below three sales methodologies can be summed up easily. In essence, all Sales Methodologies basically focus on finding out the below information from a prospect:

    1. Does your prospect have money or a budget to pay for your product or service?
    2. What is the business pain the prospect is experiencing that your service can solve?
    3. Does your prospect have the authority to make the decision to purchase your product or service?

    The first Sales Qualification Methodology that I’m most familiar is BANT. This Sales Methodology was developed internally at IBM, and is used in specific Sales Opportunities to qualify a prospect through the opportunity’s stages.

    BANT (Budget, Authority, Need, Timing)

    BANT stands for:

    1. Budget: Does the prospect have the money to pay for your software?
    2. Authority:  Does the prospect have authority to make the purchasing decision?
    3. Need: Does your software solve a business pain?
    4. Timing: When will the prospect buy (ASAP, next month, in a year)?

    In each of the above sales qualifications components, you can associate a score based off of the picklist value in Salesforce, to end up with a BANT Score. From there, you can restrict the movement through the opportunity sales process until the decided upon score has been reached.

    When selling to enterprise companies, BANT may fall short in a few areas. Specifically, the Authority qualification of BANT may have multiple people or a committee that will need to sign off of the purchase. For example, a User (possibly an internal champion) may have both the Need and Budget, however internally, the prospective company requires sign off from an executive sponsor and legal team to procure your solution. Another shortcoming in BANT, the location of where the Qualification stages fall in the BANT word – first the Budget, and then the Need qualification – does not accurately portray what is a priority to a company, and why they have become a prospect in the first place – which is typically solving a business pain,  or in BANT, represented by the Need.

    CHAMP (CHallenges, Authority, Money, Prioritization)

    To solve one of the above issues in BANT, the next Sales Qualification Methodology, CHAMP, was created.  CHAMP stands for:

    1. CHallenges: What is the business pain?
    2. Authority: Can the prospect sign off on the purchasing decision?
    3. Money: Do they have a budget?
    4. Prioritization: Is this a top priority that needs to get solved now?

    The entire reason that a prospect can be qualified initially is that they have a problem or business pain that needs to be solved. What are the prospect’s specific business challenges? In an effort to not waste your sales team time and get bad prospects into the sales cycle, the first disqualifying questions that need to be asked would focus around the prospect’s environment, and the challenges that they are experiencing. CHAMP, in essence, is very similar to BANT, but differs on where to place the emphasis falls in the sales cycle in qualifying a prospect. Like BANT, you can easily create a CHAMP Score for the above picklist values, and restriction through a validation rule how your sales team and users are able to move through the sales cycle. However, similar to BANT, CHAMP lacks the granularity of selling to enterprise organizations, where decisions need to be sent up the chain, and ROI, or return on investment, needs to be identified and correctly measured.

    MEDDIC (Metrics, Economic Buyer, Decision Criteria, Decision Process, Identify Pain, Champion)

    MEDDIC is the last Sales Qualification Methodology that solves the above issues that BANT & CHAMP both have. MEDDIC stands for:

    1. Metrics: What is the key performance indicators, and the return on investment for the prospect?
    2. Economic Buyer: Who at the prospect’s organization will commit their budget to acquire your product or service?
    3. Decision Criteria: What are the specific criteria to purchase?
    4. Decision Process: Who needs to approve the decision to purchase?
    5. Identify Pain: What is the business pain, and objectives to purchase?
    6. Champion: Within the prospect’s organization, who will be the person that fights the internal battles on your company’s behalf?

    If your business is selling software to enterprise companies, typically this may cause a shift in the way companies process their mode of business. For example, if the prospect used spreadsheets (Excel) or paper-based system to track inventory at a warehouse, moving them onto an ERP (Enterprise Resource Planning) system would be a huge paradigm shift requiring changing roles, processes, and responsibilities across many cross-functional teams at the organization. What sort of metrics does the prospect want to improve – Could it be order shipping times or reducing lost merchandise? Who in the organization will allocate and spend their budget?

    Another key thing that MEDDIC differs from the other sales methodologies, is that it includes a Champion in the qualification of a prospect. Typically, a champion is an internal person or people, sometimes a user of the product/service, or a manager overseeing them, that will push forward within the prospect’s organization to acquire your product or service. The best way to leverage a champion is to arm them with as much information as needed to get the ball going.

    Some companies may not necessarily have these exact processes outlined to follow these methodologies strictly.  When improving a sales process, you’ll want to take the above methodologies and mold them as you see fit. You could have a champion field required at a certain sales stage, however, use the BANT (and not MEDDIC) Sales Methodology to score your opportunity. To be honest, there is probably no “best” sales methodology. Each company and industry is unique, and what may work for one organization will not work as good in another.