After speaking with a colleague the other day, they asked me what are the best practices for change management within Salesforce. This article will dive into how I manage changes in Salesforce using a Salesforce custom object used to build a Change Request app.
Salesforce Change Management Methodology
The reason that change management is important is for several reasons; we want to continually keep metadata clean, remove unused processes, and manage our storage effectively. Also, being able to track and prioritize requests helps keep your company’s overall initiatives moving forward. I’ve been the main administrator of a Salesforce Org that went live in December, 2000. As of this writing, that was almost 18 years ago – back when Salesforce was first founded. As I’m sure you can understand, there were fields, apps, and components within that Org that were no longer used and were filling up storage space. One example was the activity history. We were using over 5 GB of that, with them ranging from “Call: Not In” from back in 2004. Do we really need this data?
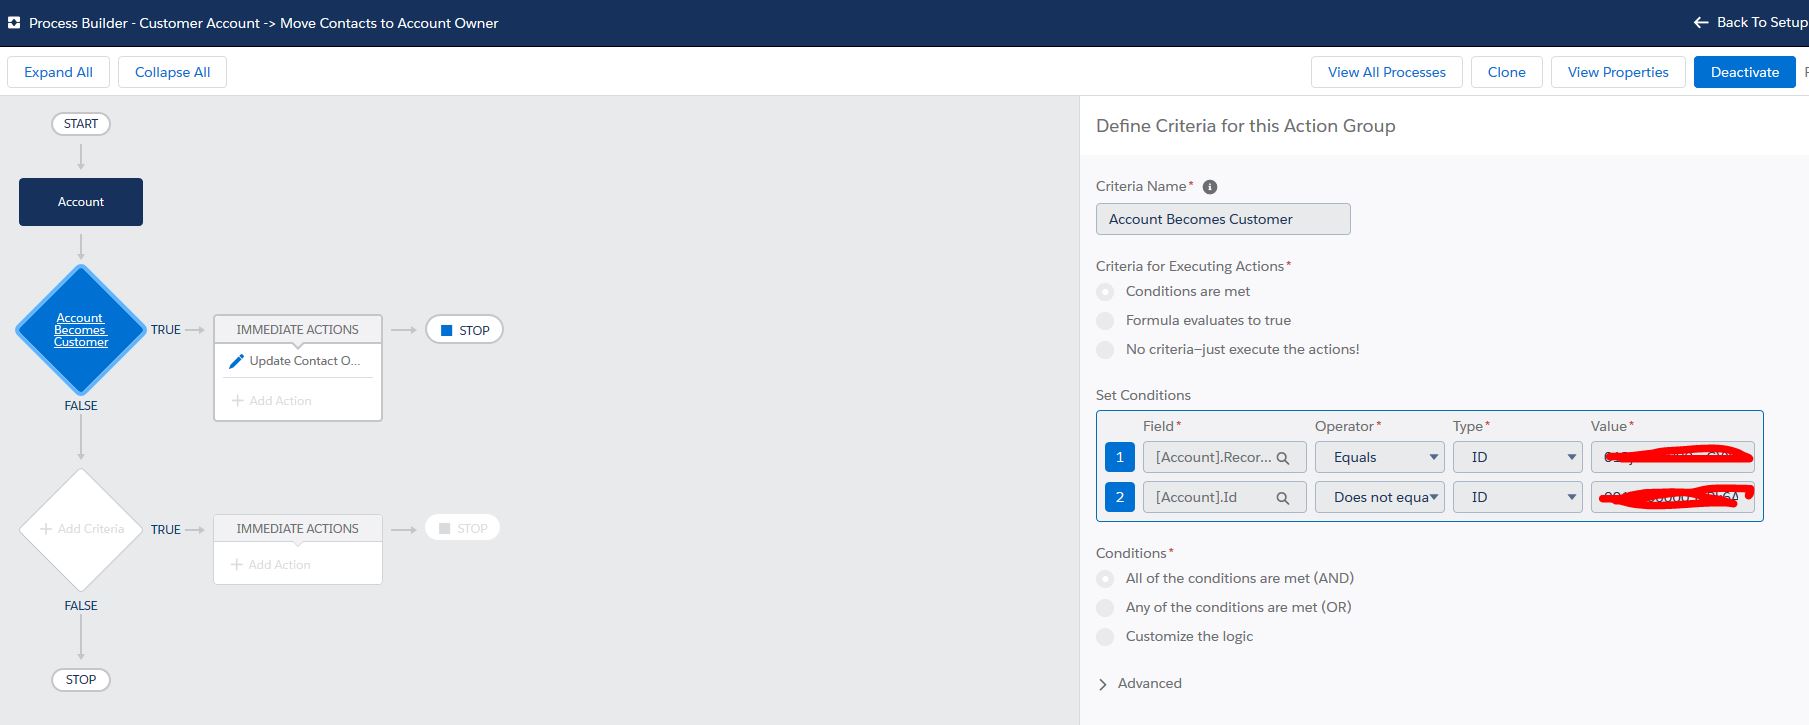
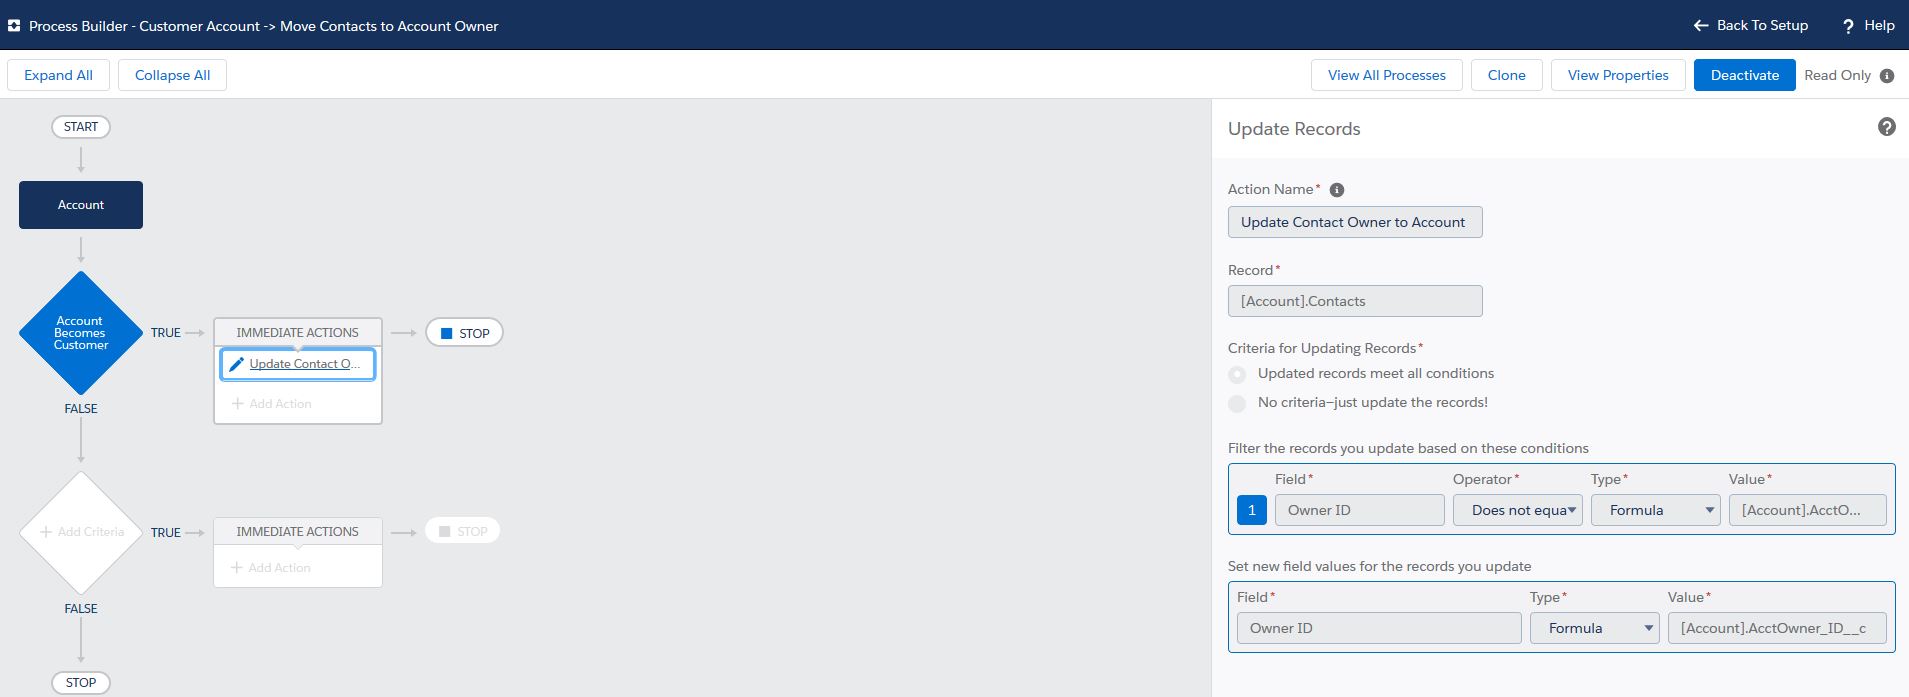
Using a custom object (or leveraging the Case object with a unique Record Type), you can easily build a tool within Salesforce to track, approve/deny changes, and have a historical reason of “WHY” you built a certain field, process, email alert, workflow, etc.
Salesforce Change Request Template
The template I use to manage the change has a few components, which can easily be updated and extended to your particular Org’s needs.
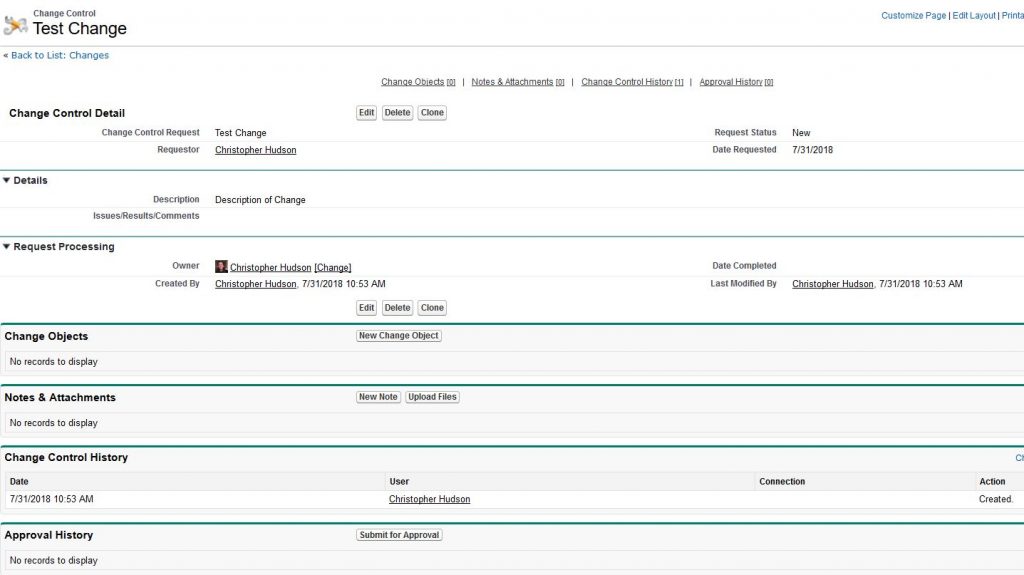
A. Change Request Name:
This field provides the name of the change request, which, at quick glance, should display a high level overview of the objectives of the change from the requestor.
B. Change Stage/Status:
I use the below drop-down selections to understand where a change is in it’s life-cycle.
-Not Started
-Approved
-In Process
-Completed
-Denied
Here, you can have workflow rules & approvals. When a change is created, it can send me an email of a new change with some of the information. I can quickly take a look and approve/assign it to the appropriate person to follow up. In rare cases, I will deny a request. Once approved and assigned, it will be moved to in process until completed.
C. Change Requestor:
This field is used to understand who is requesting this change, and is used to send an email alert when it was successfully logged, and can email when completed/denied. This closes the loop for the parties involved.
D. Change Date Fields:
Two important date fields I leverage are:
-Date Requested: This field is updated when a Change record is created.
-Date Completed: Once stage is marked to completed, it will update the date field to TODAY(). This is when it is moved to either Completed or Denied.
E. Change Owner:
Who the Change owner is assign to complete the task. When the ownership is changed, an email alert can go out to update the assigned owner. All changes are assigned to me as the owner, and then I can easily update that and have an automated email go out to the newly assigned owenr.
F. Change Description:
This field is required to create a change. The change requestor will fill out what is being asked. These projects can be something that can take as little as 5 minutes, such as adding a picklist value to a field, to up to several months – such as tracking a project and the sub-requirements of that project. Sometimes changes prompt the need for more information, and this can be tracked in the notes/attachment related list of the record, or as a working revision in the ‘results’ section.
G. Results:
The result field is used to explain the methodology used to perform the task. Typically what is included the URLs of the fields, the field names, and any other comments relating to the results. This field is very important to use for historical tracking of why a field was created, and what are all the components of the change that were used to solve this particular initiative.
Salesforce Change Request App
Instead of recreating the wheel, you can also easily download a change request app from the Salesforce AppExchange. The app I use is called Change It. I wanted to give a shout out to CloudLogistix who created this app back in 2007. I still use it to this day. You can, of course, easily create a custom object or update the Case record to solve this, but out of the box it works great, and has the majority of the above fields & created list views. You will need to have an admin create the workflow rules and email alerts, but it is great if you don’t want to hit the soft limit of the allowed workflow rules.
Hope this has shed some light into how I handle change management in Salesforce. If you have any questions or comments, please don’t hesitate to reach out to me at the contact form or in the comments below!